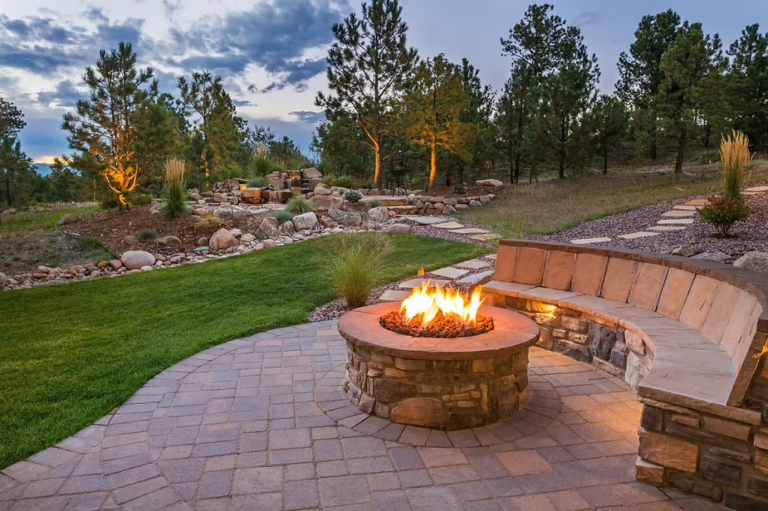
Late August and early September are the best weeks of the year to inspect and repair an outdoor fire feature, because warm days let fresh mortar cure properly before the first hard frost. If your fire pit, outdoor fireplace or masonry seating has been sitting through a season of heat, rain and heavy use, small cracks that looked cosmetic in June tend to open up fast once fall temperature swings begin. This guide from Q&E Keystone Masonry walks through our masonry services in Bucks County the inspection, cleaning and tuckpointing work worth doing now, plus the seating upgrades that make autumn hosting more comfortable.
Why Late Summer Beats Late Fall for Fire Feature Repairs
Mortar is a hydraulic material, which means it needs both time and reasonable temperatures to gain strength. Most masons want ambient temperatures above 40 degrees Fahrenheit for at least 72 hours after pointing, and ideally a full week of mild weather while the joint continues curing.
Schedule repairs in September and you get that window comfortably. Wait until the first cool snap in late October, and you are either paying for cold-weather protection blankets or postponing the job until spring, after another freeze-thaw cycle has widened every crack.
- Cure conditions: 50 to 80 degrees with moderate humidity is close to ideal for repointing.
- Lead times: masonry crews book out two to five weeks in late summer, so calling in August often means work completed by mid-September.
- Freeze-thaw protection: a sealed, sound joint keeps water out of the wall before it can freeze and spall the face of the brick or stone.
Inspect the Fire Feature Cold, Not Warm
Do your walkthrough at least 24 hours after the last fire, when everything is at ambient temperature and hairline cracks are at their widest. Bring a flashlight, a screwdriver or awl, and a shop vac for loose debris.
What Thermal Stress Looks Like in Mortar
Repeated heating and cooling expands and contracts masonry units at different rates than the joints between them, and that differential is what eventually breaks the bond.
Look for these specific signs:
- Powdery or sandy joints that give way when you scratch them with a key or awl, usually meaning the binder has burned out or washed out.
- Stair-step cracking running diagonally through joints, which points to settlement rather than heat alone.
- Spalled firebrick faces, where thin flakes have popped off the interior of the firebox after moisture trapped inside turned to steam.
- Open joints wider than 1/8 inch anywhere in the burn chamber, since gaps let heat reach materials that were never rated for it.
- Displaced or rocking cap stones on a seat wall or fire pit rim, a sign the setting bed has failed.
- White efflorescence on the exterior face, which is dissolved salt left behind by water moving through the assembly.
Any joint you can pick out with a fingernail should be raked and repointed. A single soft joint is routine maintenance; a whole course of them usually means water is entering somewhere above and needs to be traced.
Firebox Mortar Is Not the Same as Veneer Mortar
The interior of a firebox or the bowl of a wood-burning fire pit should be built with firebrick set in refractory mortar, typically rated to withstand 2,000 to 3,000 degrees Fahrenheit, with joints kept tight at roughly 1/16 to 1/8 inch. Standard Type N or Type S masonry mortar belongs on the exterior veneer and seat walls, where it will never see direct flame.
If someone previously patched your firebox with bagged general-purpose mortar, expect it to crumble within a season or two. Replacing it with a proper refractory product is one of the highest-value repairs on this list.
Clean Before You Repair
Soot, ash and creosote hide defects and interfere with the bond of new mortar. Work through cleaning in this order:
- Shovel and vacuum out ash completely, including under the grate. Damp ash holds sulfur compounds that slowly attack mortar joints.
- Dry brush the interior with a stiff natural or brass bristle brush. Skip steel wire on soft brick.
- Wash the exterior with plain water and a masonry-safe cleaner. Avoid muriatic acid unless a professional is diluting and neutralizing it, since it can etch stone and leave permanent burn marks.
- Rinse from the bottom up, which prevents dirty runoff from staining dry masonry below.
- Let everything dry 48 hours before evaluating joints again, because wet mortar can look sound when it is not.
Tuckpointing: What the Work Actually Involves
Tuckpointing (more precisely, repointing) means grinding or raking out deteriorated mortar to a depth of roughly 3/4 inch, or about two and a half times the joint width, then packing in fresh mortar in layers and tooling it to match the original profile. Cutting too shallow is the most common DIY mistake, since a thin skim coat has almost no bond and pops out within a year.
Matching matters as much as technique. New mortar should be no harder than the surrounding masonry units, which is why historic brick often calls for a softer Type O or lime-based mix rather than the Type S that many homeowners assume is stronger and therefore better.
- Typical cost: most repointing runs $10 to $25 per square foot of wall face, with small fire pit rims often landing in the $450 to $1,500 range.
- Timeframe: a standard fire pit takes one crew day; an outdoor fireplace with a chimney and hearth extension usually takes two to four.
- Curing: keep the repaired feature dry and unlit for at least seven days, then start with two or three small, short fires before a full burn.
Upgrading the Masonry Seating Around the Fire
The seating usually gets more scrutiny than the fire pit itself once guests arrive in October. Comfortable masonry seat walls sit 18 to 20 inches high with a cap 14 to 18 inches deep, and the cap should overhang the wall face by about an inch so water sheds clear of the joints.
While you are inspecting, check that cap stones are still fully bedded, that no joint has opened along the back of the wall, and that the wall has not tipped outward from soil pressure. A seat wall that rocks under weight is a liability well before it is a repair project.
Worthwhile Additions Before Hosting Season
- Extending an existing seat wall by six to ten linear feet, which adds seating for four to six more people at roughly $70 to $150 per linear foot depending on stone.
- Adding a hearth extension or paved apron so chairs sit on level material rather than settling turf.
- Resetting sunken pavers around the fire circle, a common problem after a wet summer.
- Integrating low-voltage lighting into the cap course or a riser, which makes evening gatherings safer without washing out the firelight.
Safety Checks Worth Ten Minutes
Confirm the fire feature sits at least 10 feet from structures, fences and overhanging branches, which is the clearance most local codes and fire officials use as a baseline. On gas-burning units, check the burner pan for standing water, look for corrosion at the connector, and have a licensed technician test the line if you smell anything at ignition. Replace lava rock or fire glass that has fractured, because trapped moisture in cracked media can pop violently when heated.
Book Your Fire Feature Inspection Before the Fall Rush
Q&E Keystone Masonry inspects, cleans and repoints fire pits, outdoor fireplaces and seat walls with mortar matched to your existing masonry, scheduled while conditions still favor a proper cure. Call or request an estimate now to get repairs finished before your first fall gathering.